step-by-step guide for creating and deploying the FAQ & Feedback Agent
Created: 23/10/2025

Step 1: Log in
1. Go to shambho.ai.
2. Sign in with your credentials.
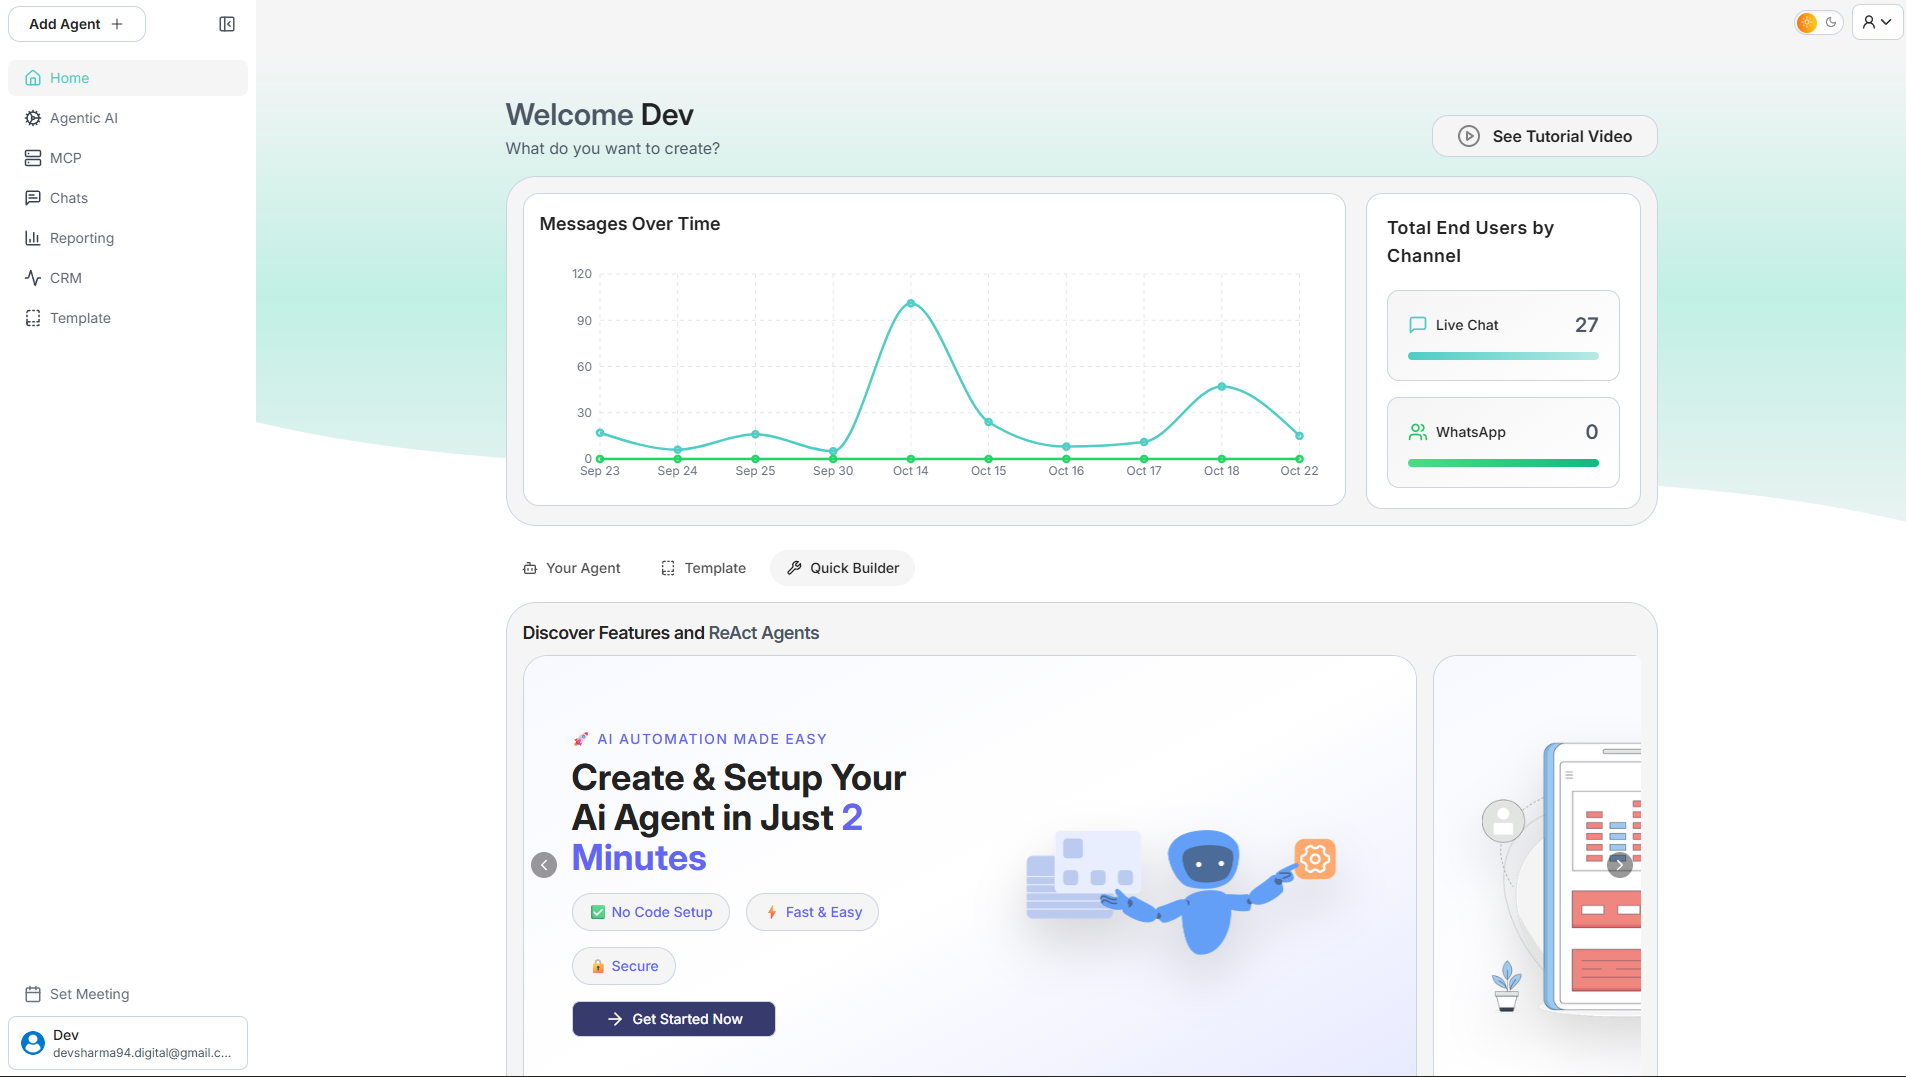
3. After logging in, you will land on the Dashboard.
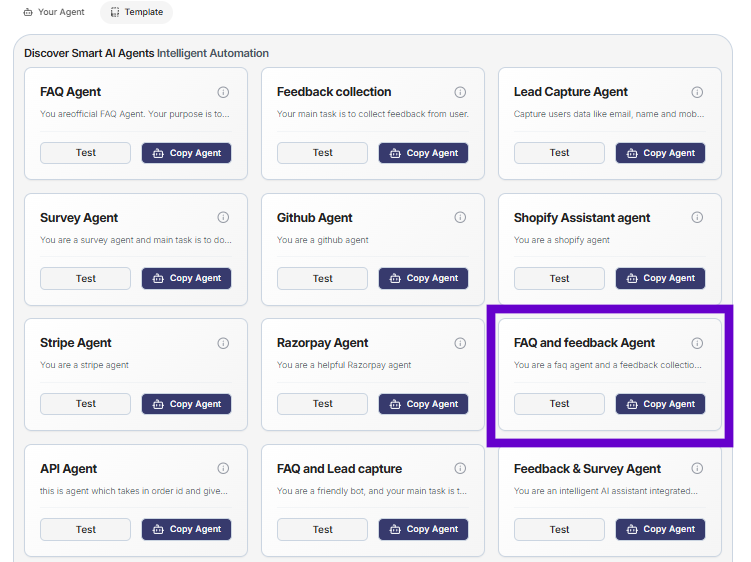
Step 2: Create an FAQ & Feedback Agent from a Template
1. From the main dashboard, select the Template tab.
2. Locate the FAQ and feedback Agent card under the "Discover Smart AI Agents Intelligent Automation" section.
3. Click the Copy Agent button. This will create a new hybrid agent that can both answer questions and collect feedback.
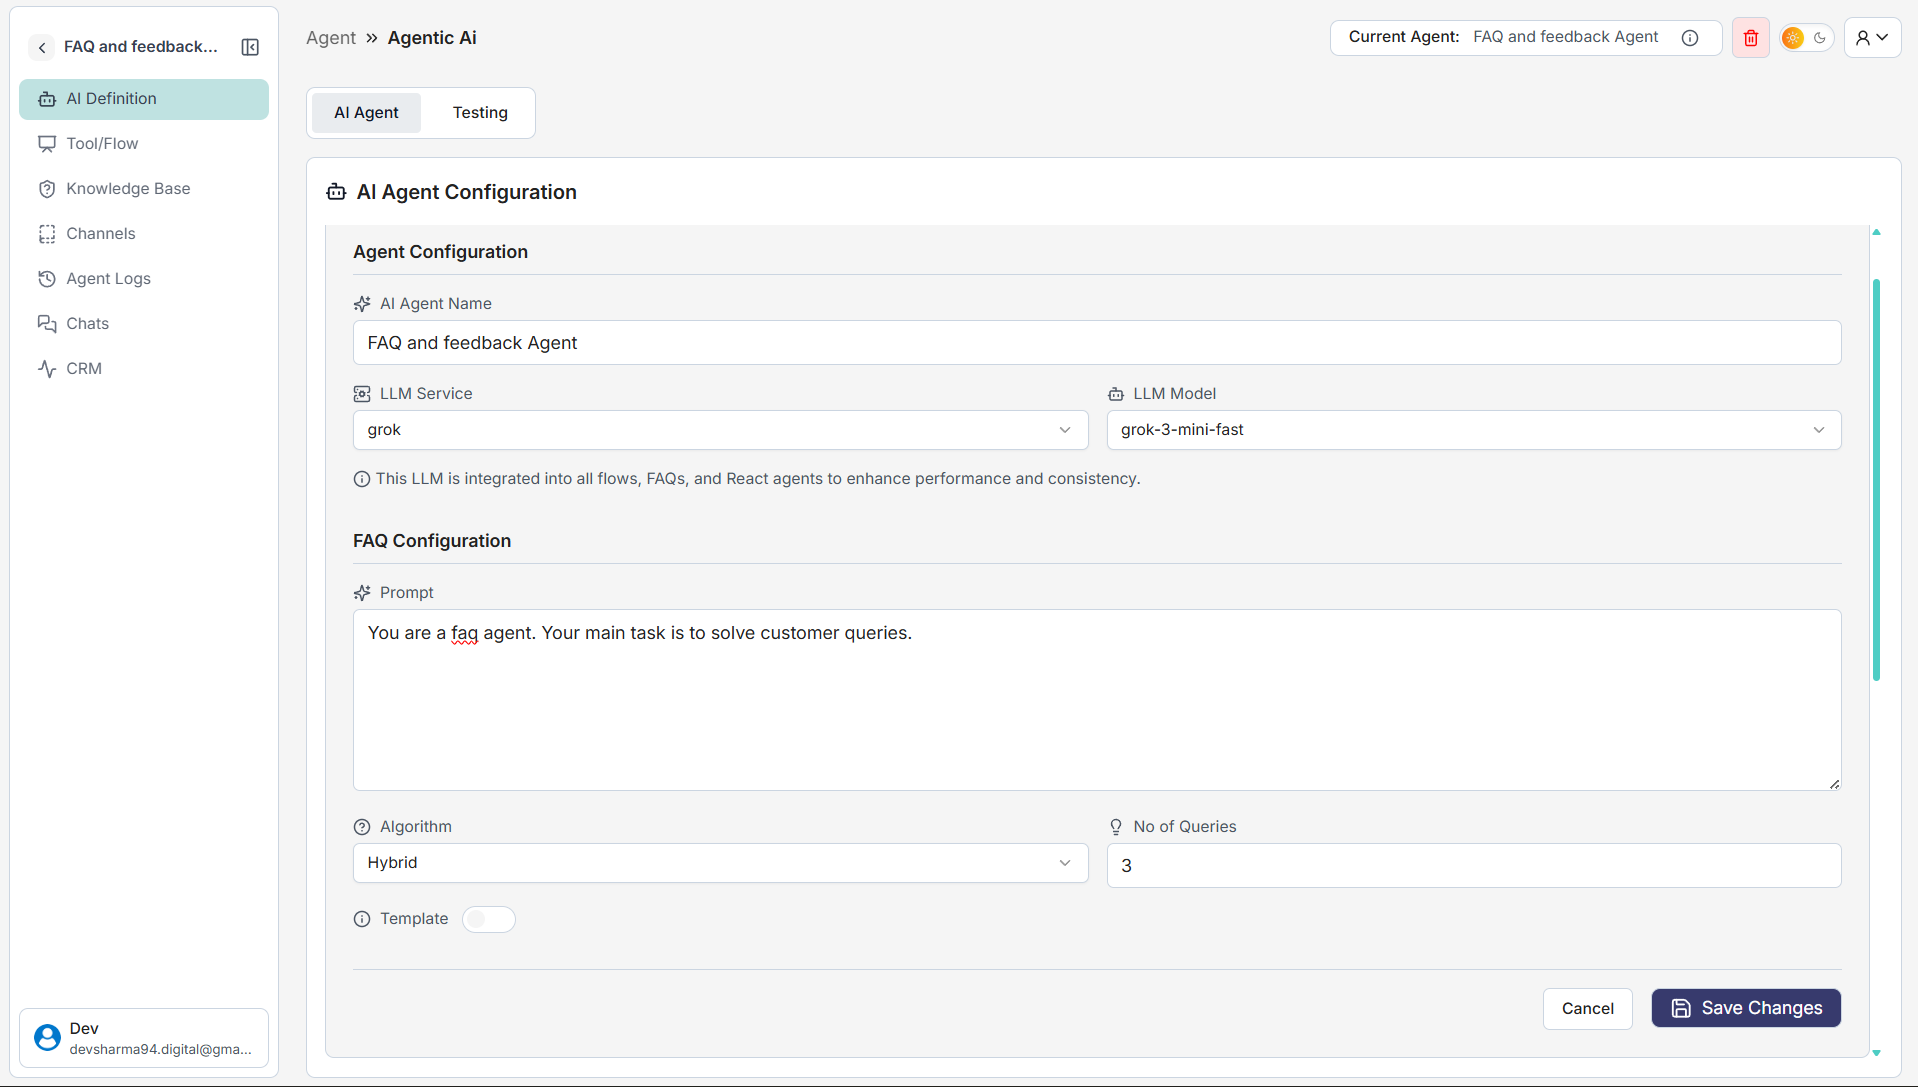
Step 3: Configure AI Prompt (Edit Configuration)
1. At the top, in the "AI Agent Prompt Configuration" section, click the edit icon (the pencil in the top-right corner of the card).
2. A window will open. Fill in the details for your FAQ agent:
• AI Agent Name: Give your agent a name (e.g., "FAQ and feedback Agent").
• Prompt: Write instructions for how your bot should behave (e.g., "You are a faq agent. Your main task is to solve customer queries.").
• LLM Model: Choose an LLM model from GPT, Grok, and Gemini.
3. Click Save.
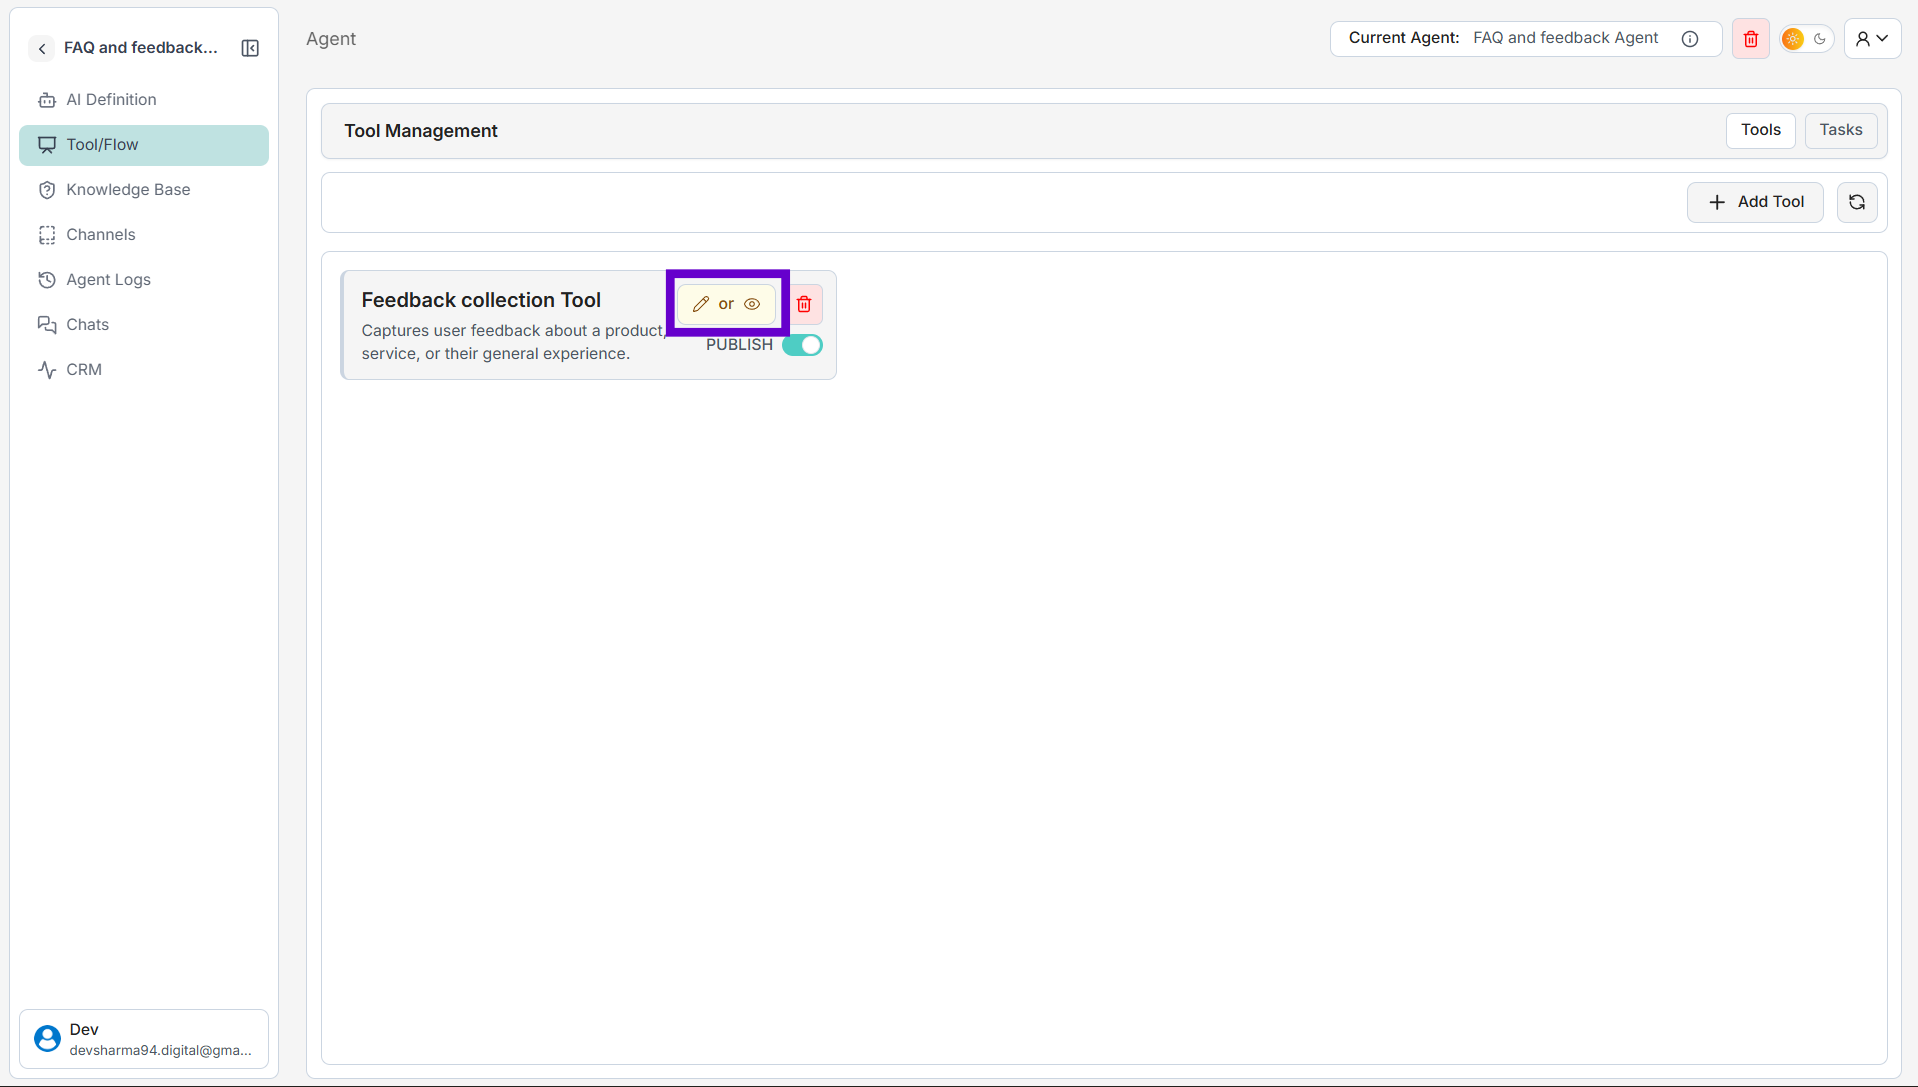
Step 4: Configure the Feedback Collection Tool
1. From the left menu, click on Tool/Flow.
2. You will see the "Feedback collection tool" on the Tool Management page. Click the edit icon (the pencil) to configure it.
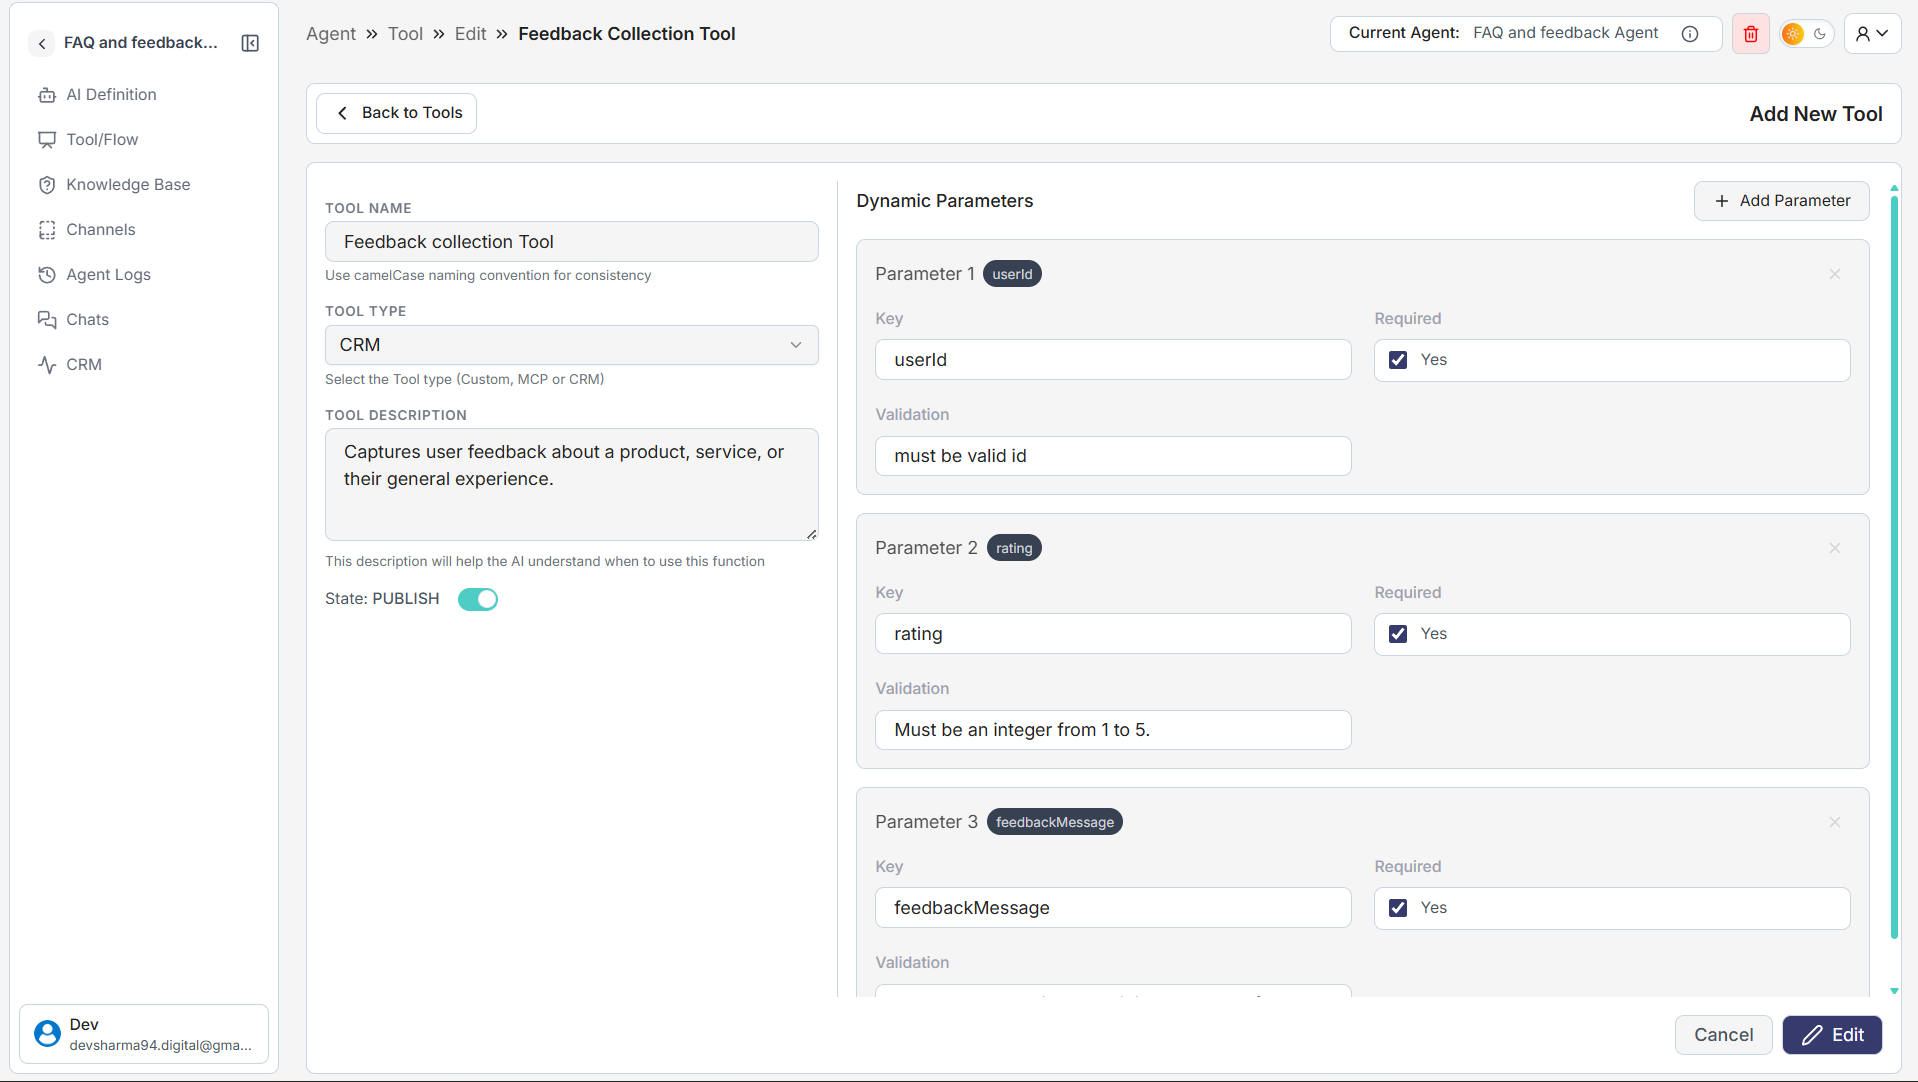
3. In the "Dynamic Parameters" section, define the information you want to collect (e.g., userId, rating, feedbackMessage).
4. After setting up your parameters, click the Edit button at the bottom right to save.
Step 5: Add Questions and Answers (Q&A)
1. From the left menu, click on Knowledge Base.
2. Click the Add QA button to open the "Add Question / Query" window.
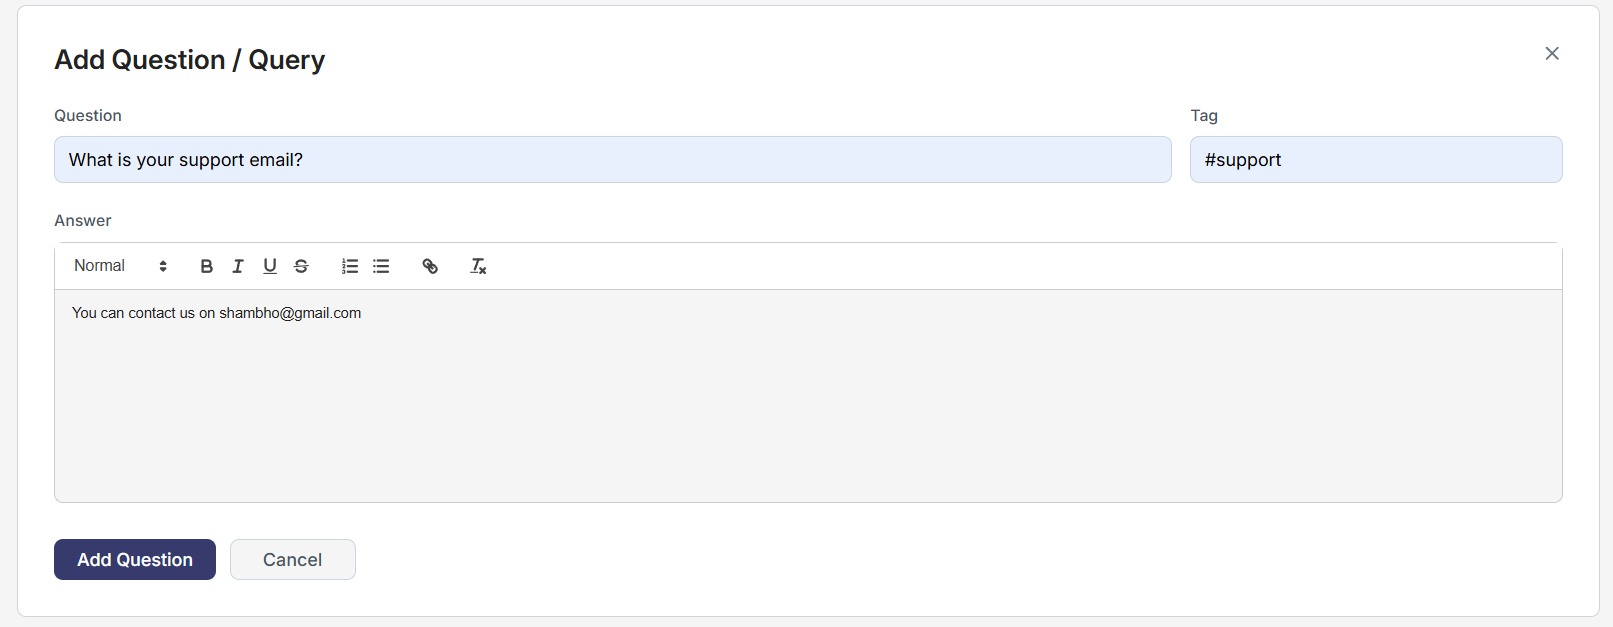
3. Fill in the fields for each FAQ you want to add:
• Question → Type the customer’s question (e.g., “What is your support email?”).
• Answer → Write the bot's reply (e.g., “You can contact us on shambho@gmail.com”).
• Tag → Add a tag to organize the question (e.g., #support).
4. Click Add Question. Repeat this process for all of your FAQs.
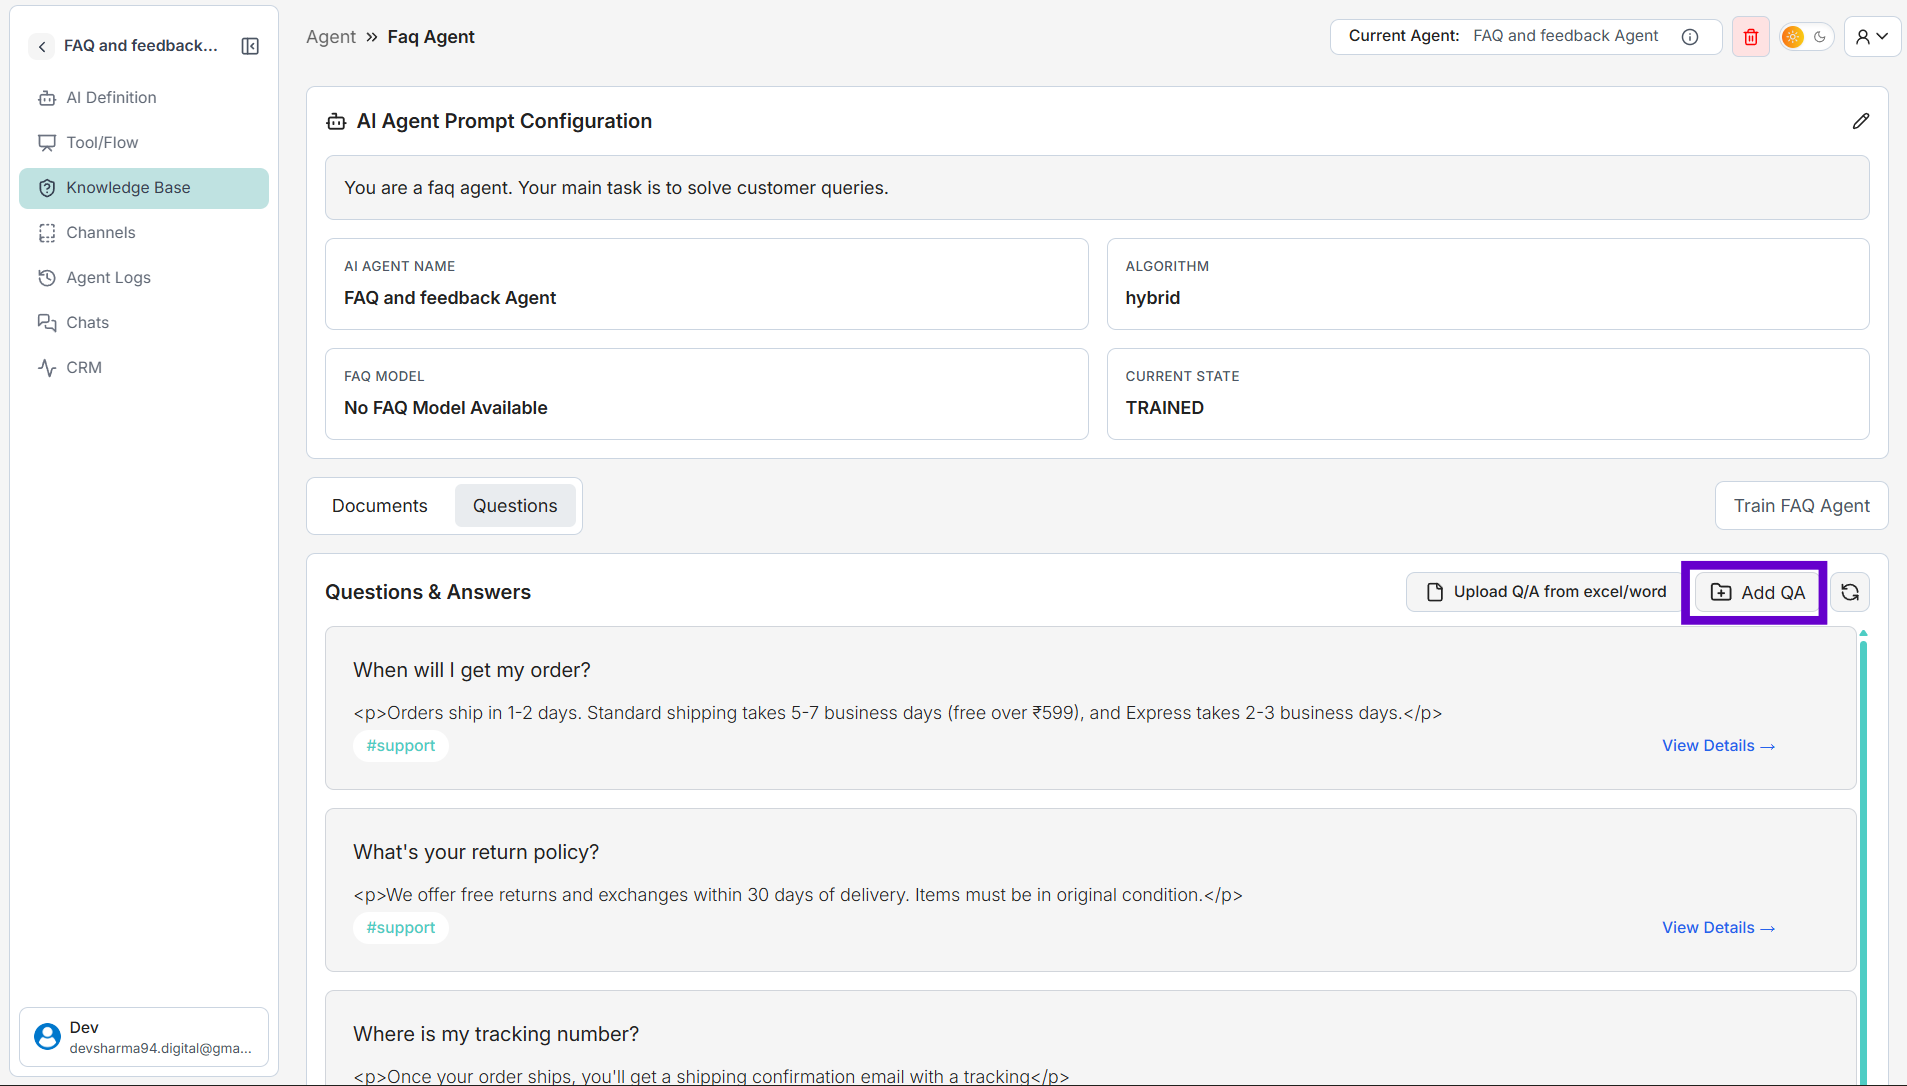
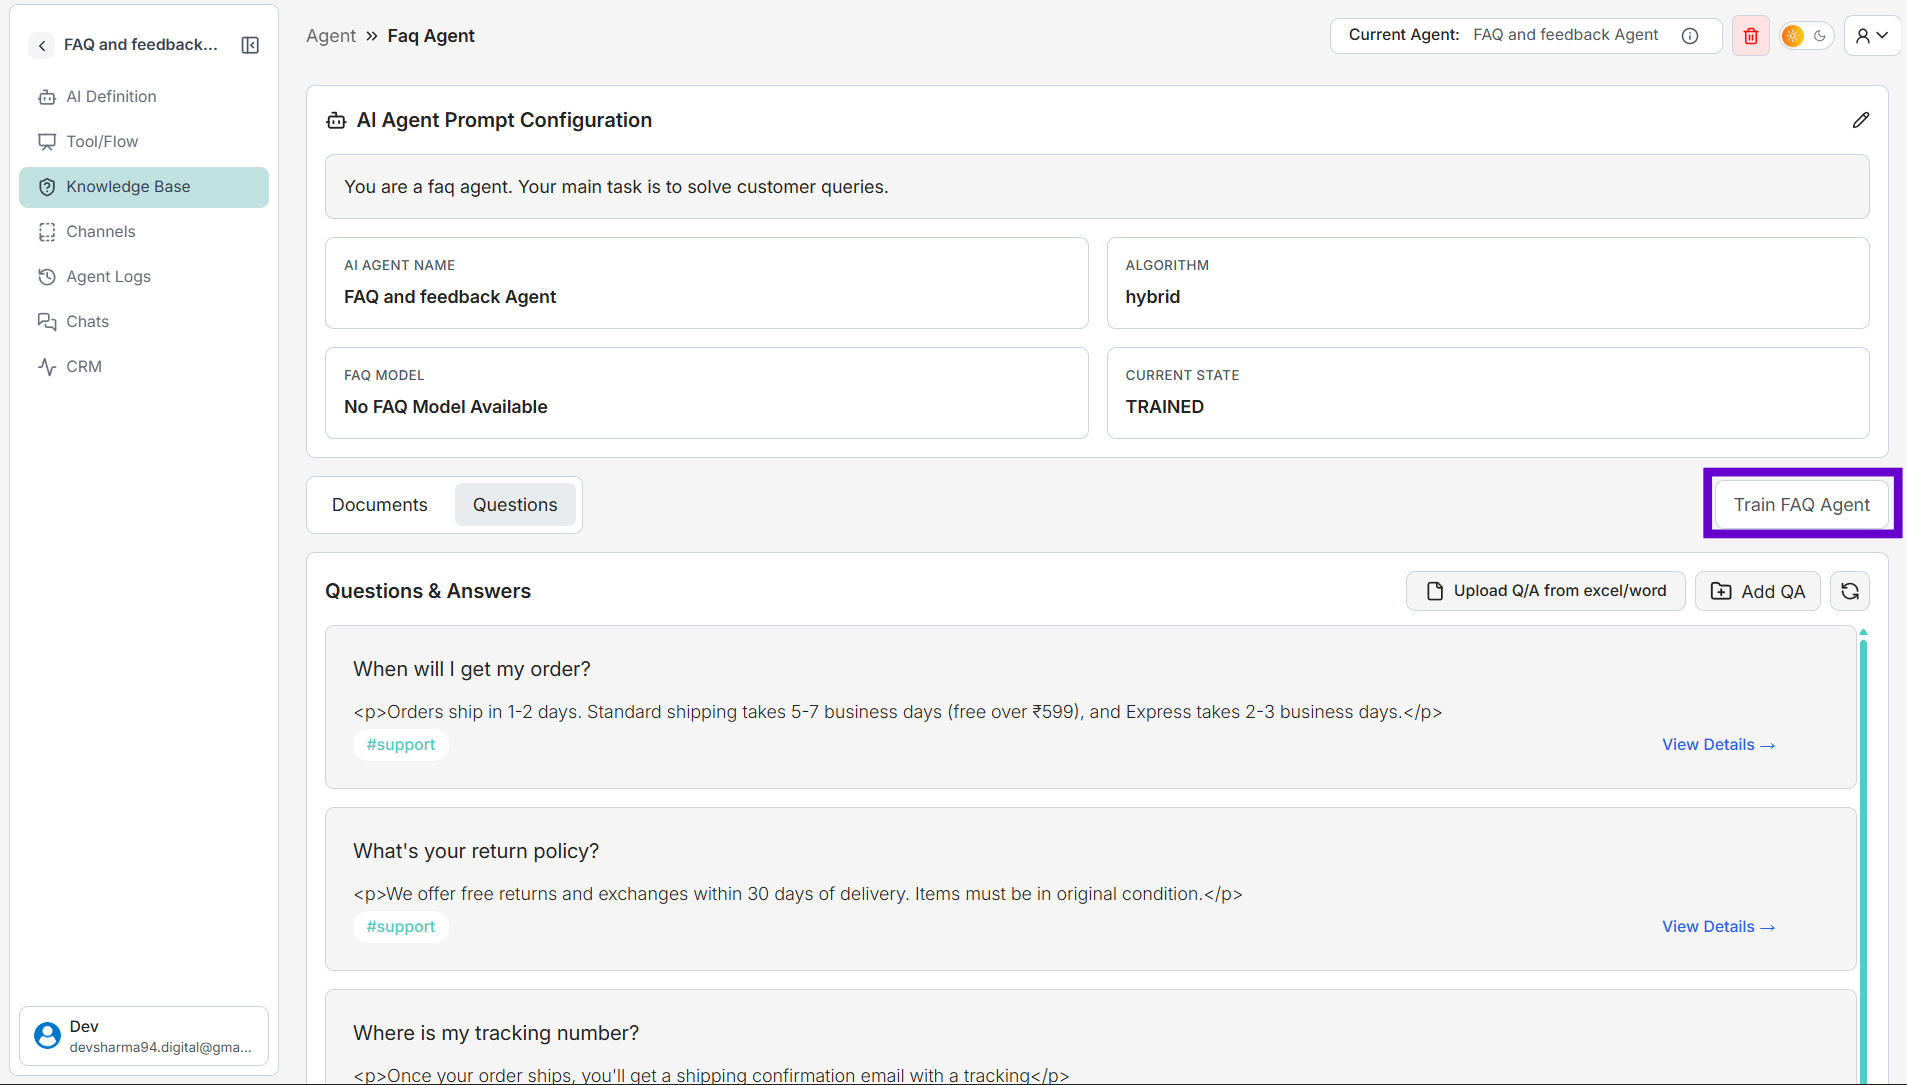
Step 6: Train Your FAQ Agent
1. After adding all your questions and answers in the Knowledge Base, click the Train FAQ Agent button.
2. Wait for the training process to complete. The "CURRENT STATE" will change to TRAINED. This step is crucial for the agent to learn the Q&A data.
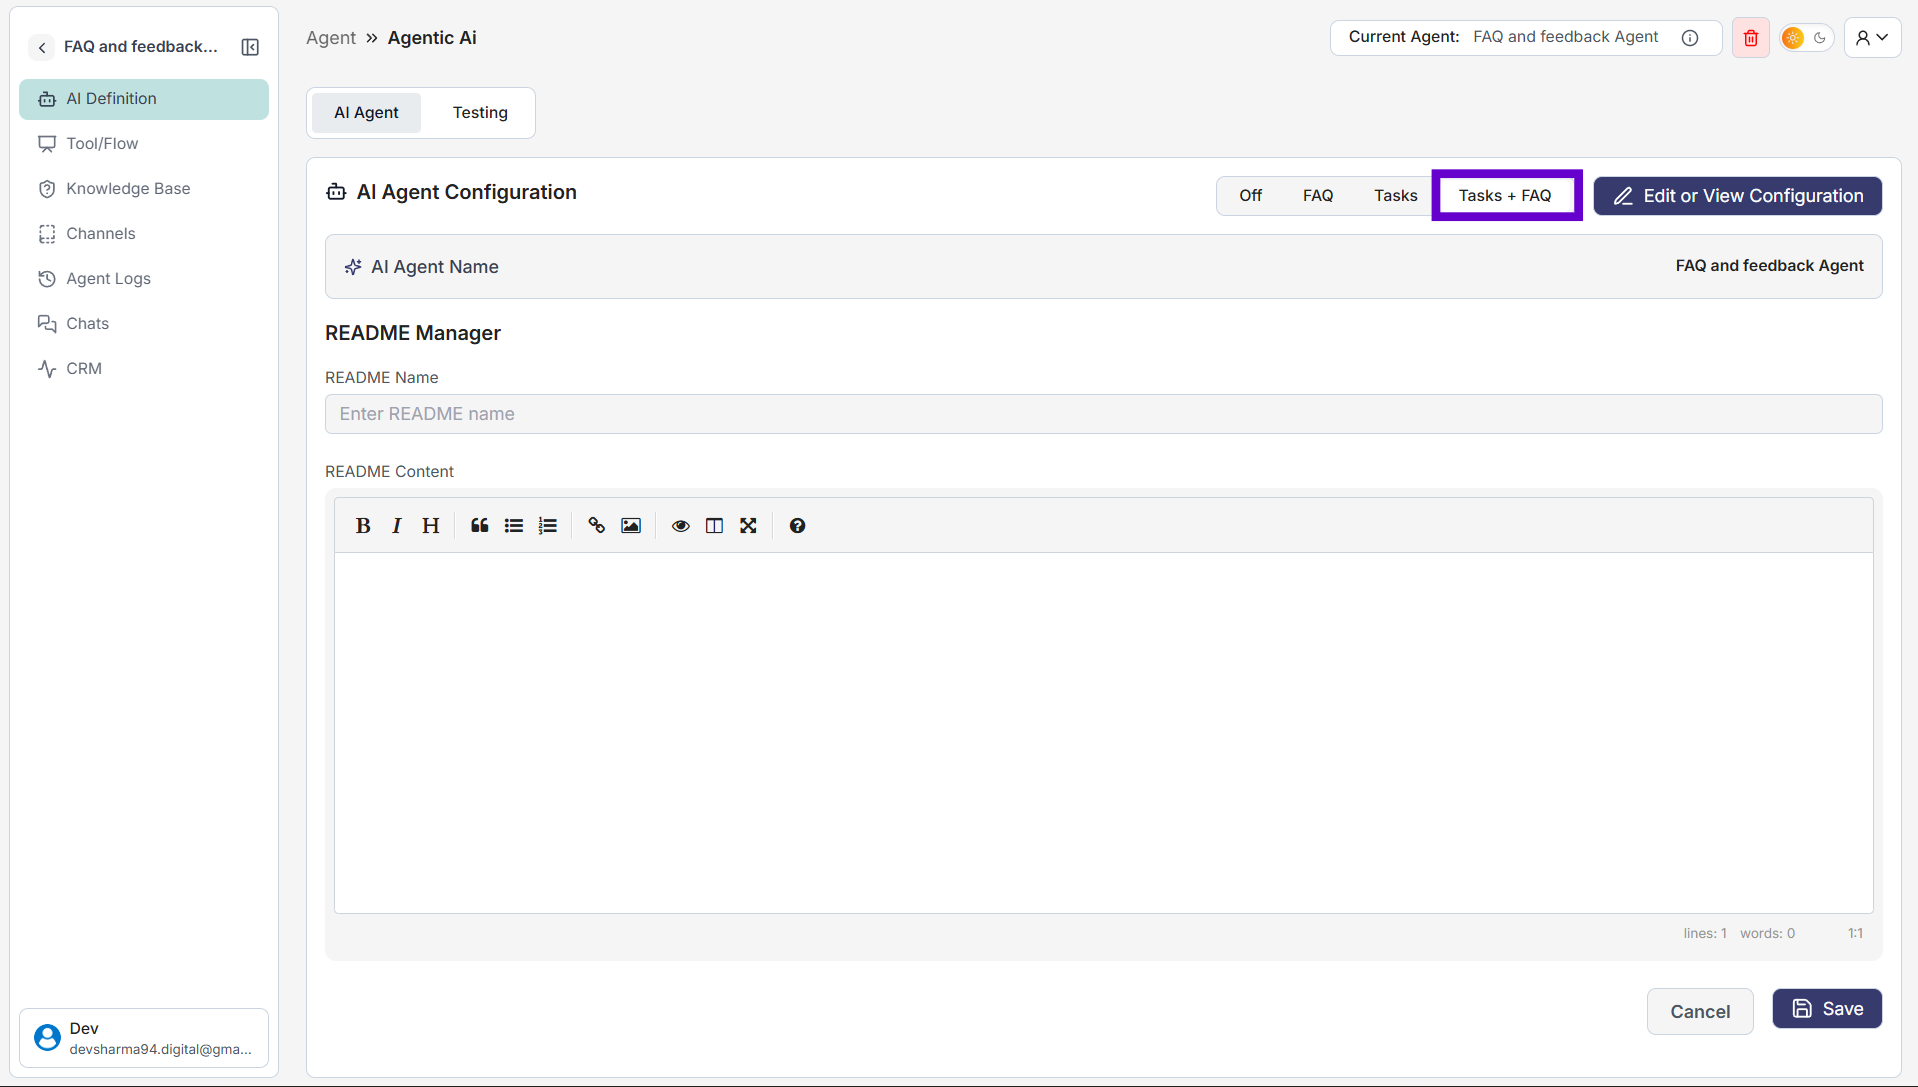
Ensure the agent is set to operate in FAQ mode.
1. On the AI Definition page, locate the AI Agent Configuration toggle switch.
2. Select the task + FAQ option. This instructs the agent to primarily use the trained knowledge base to answer user queries.
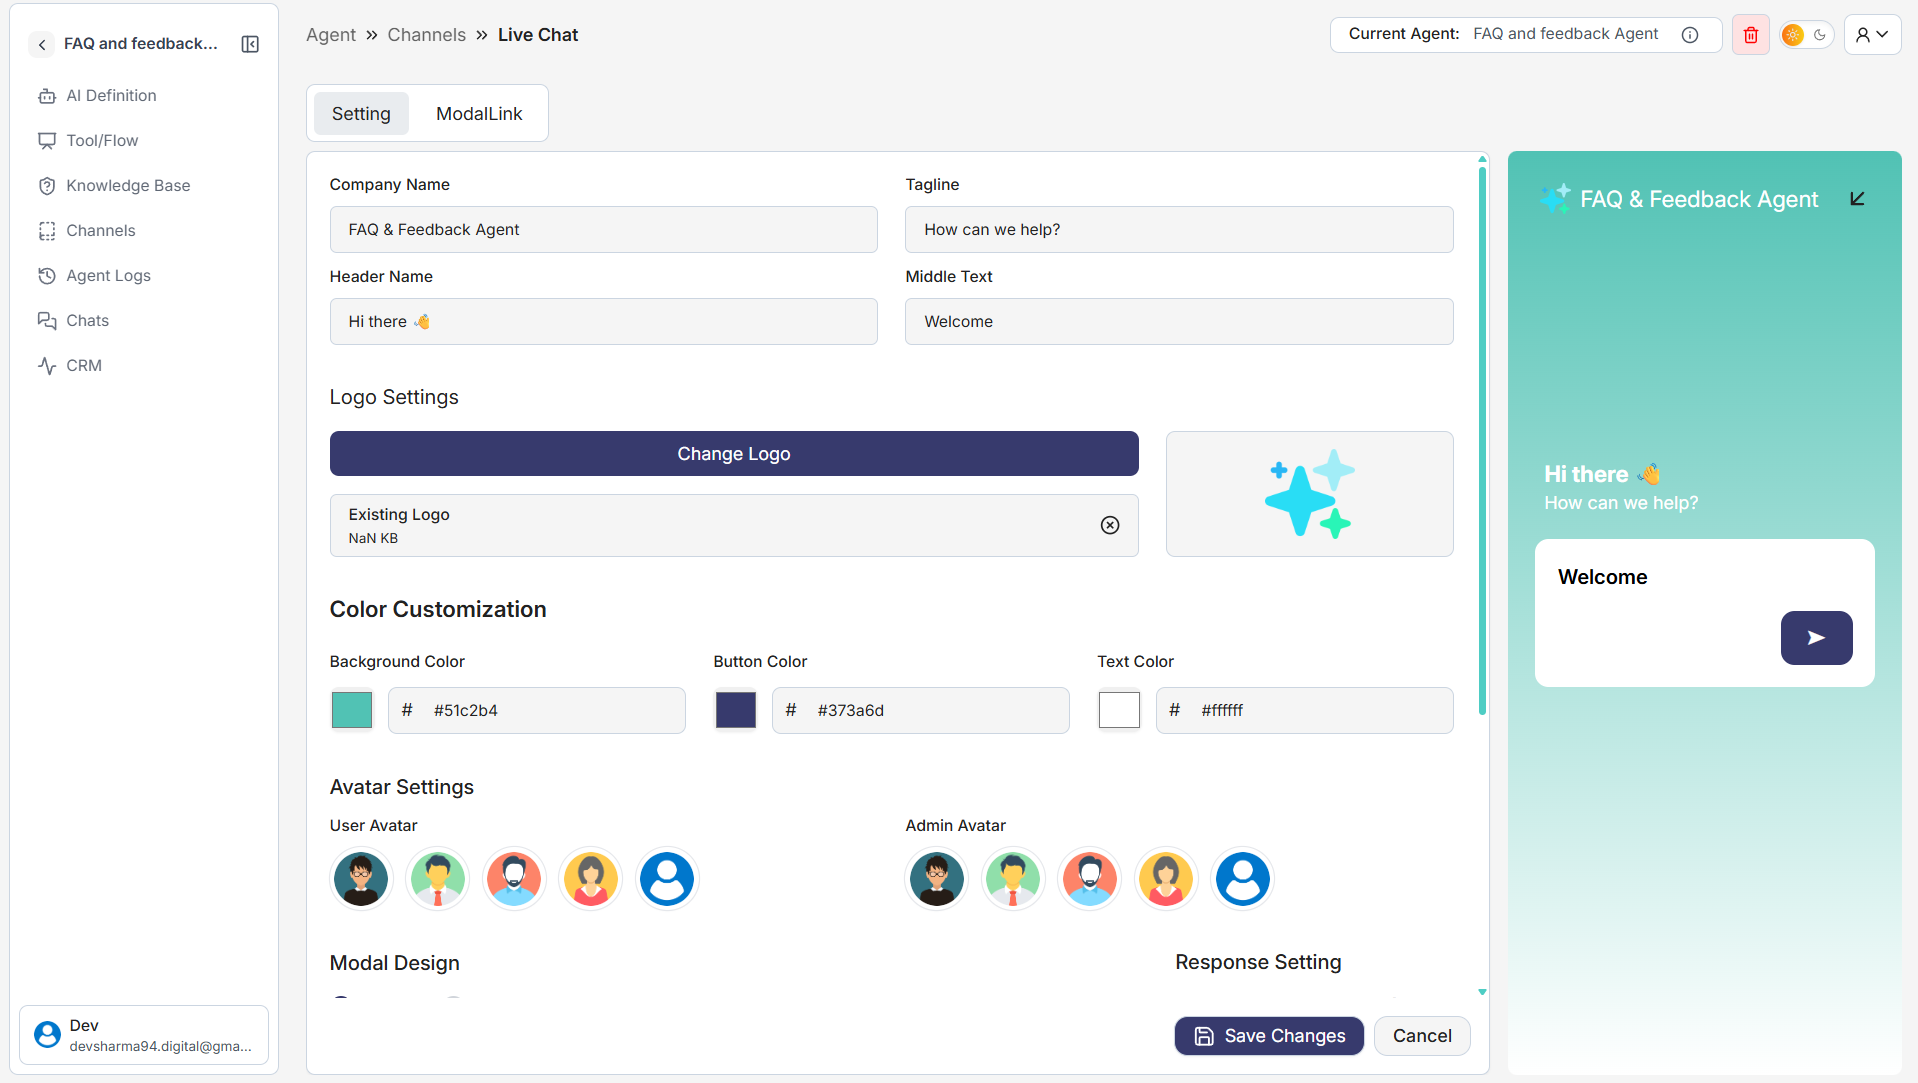
Step 8: Customizing Your Live Chat Appearance
1. In the left-hand navigation menu, click on Channels.
2. A sub-menu will open. Click on LiveChat.
3. Adjust the following options. You can see your changes reflected in the live preview on the right side of the screen. Company Details:
• Company Name: Enter your company's name (e.g., "XYZ"). • Tagline: Add a short, welcoming tagline (e.g., "How can we help?").
• Header Name & Middle Text: Customize the greeting messages that users will see first (e.g., "Hi there 👋" and "Hi Welcome To Shambho_ai").
• Logo Settings: Click Upload Logo to add your company's logo to the chat widget.
• Color Customization: Choose your brand's colors for the chat widget's Background Color, Button Color, and Text Color.
• Avatar Settings: Select icons for both the User Avatar and the Admin Avatar (your bot's icon).
• Modal Design: Choose between a Modern or Classic look for the chat window.
• Detail Setting: Turn this ON if you want the bot to collect email IDs from users.
4. Once you are satisfied with the appearance, click the Save Changes button at the bottom.
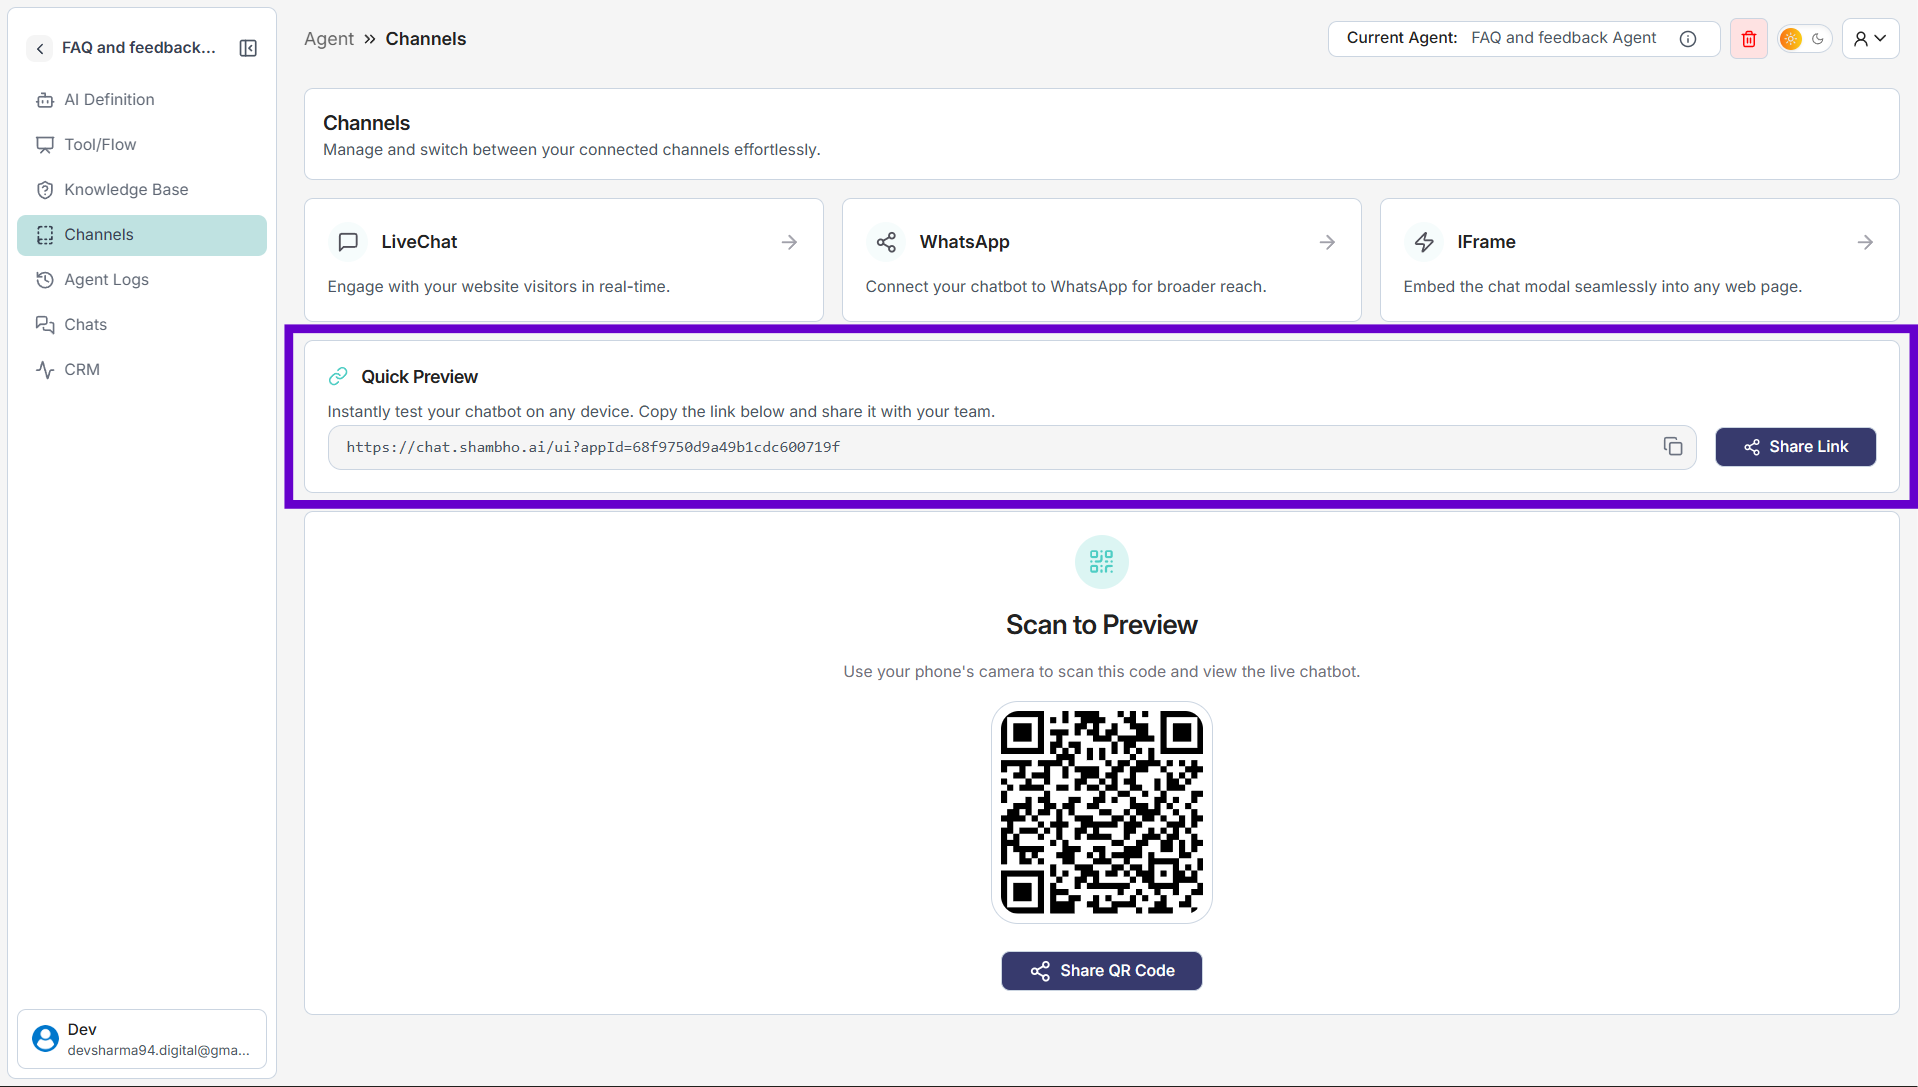
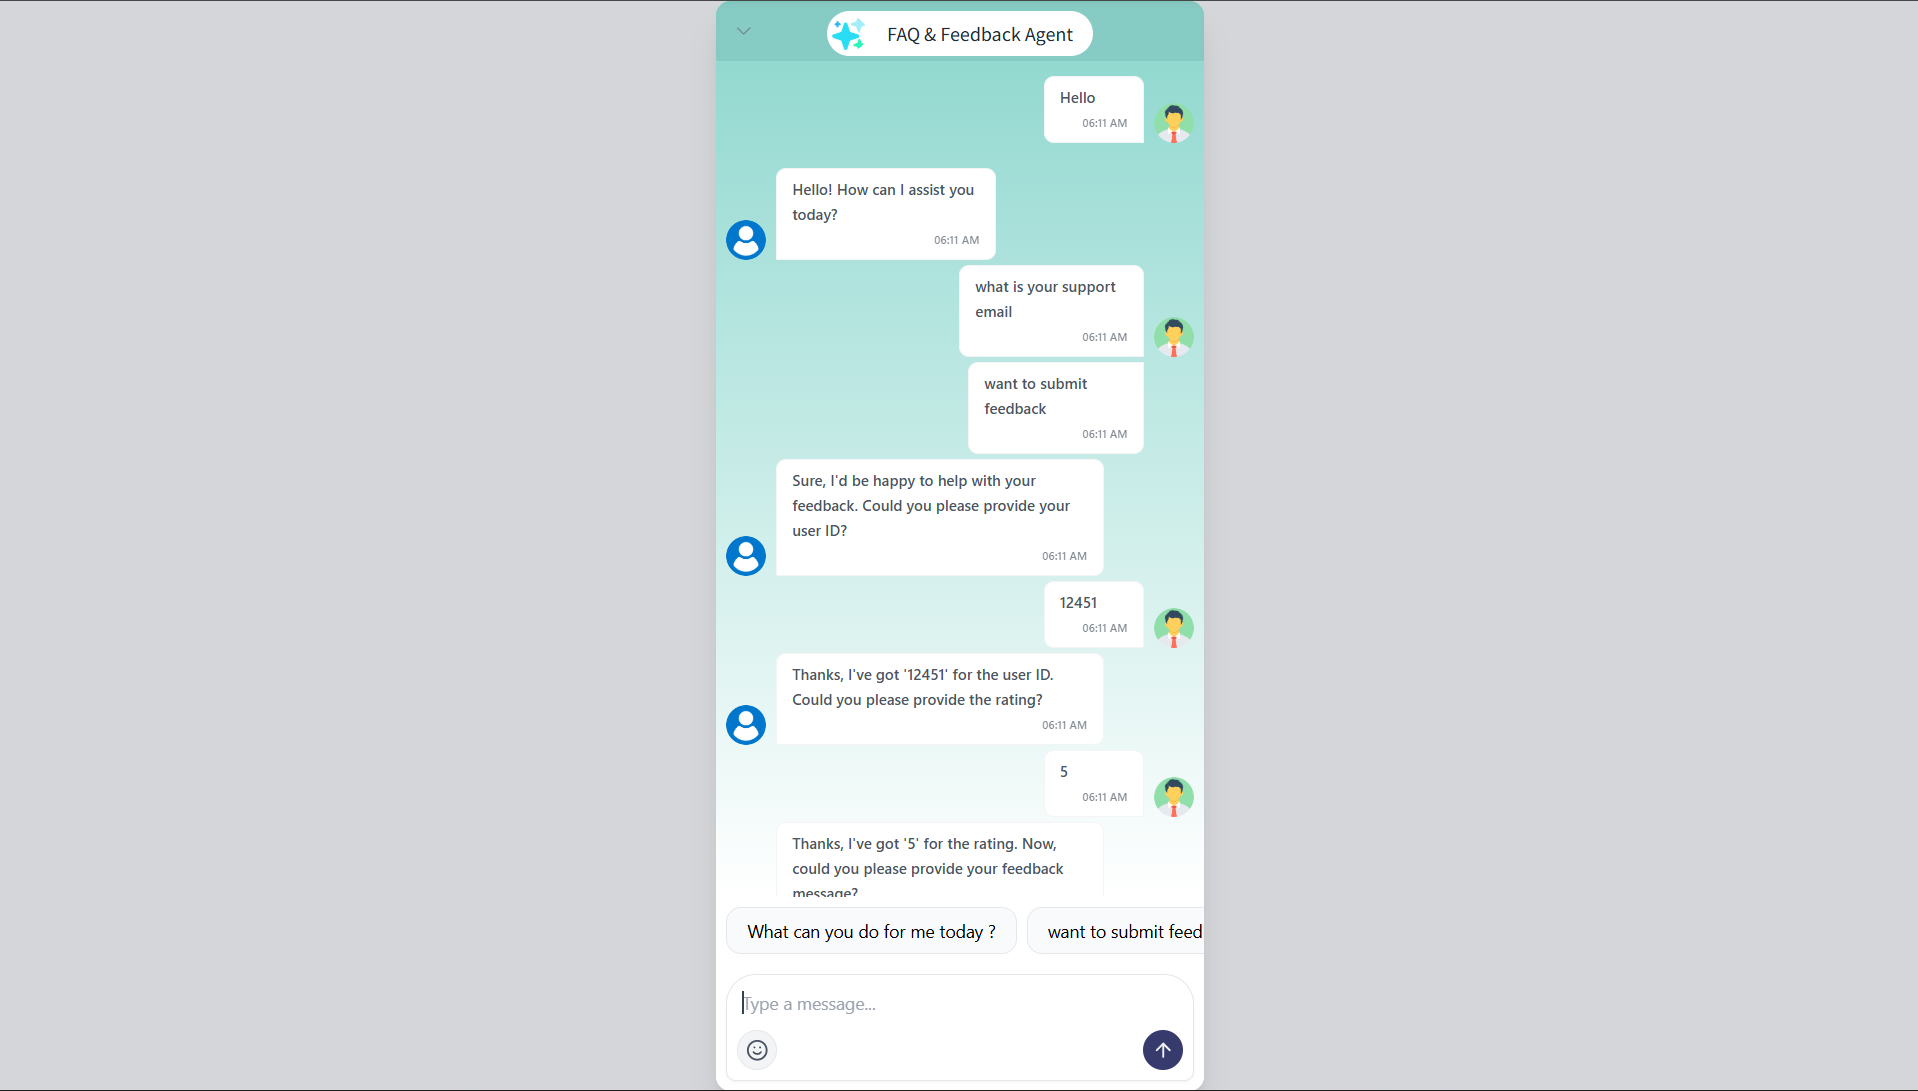
Step 9: Test Your Chatbot
1. In the left-hand menu, click on Channels.
2. You’ll see different options such as LiveChat, WhatsApp, and IFrame.
3. Under Quick Preview, copy the provided preview link.
4. Paste the link into your browser to open and test the chatbot.
5. Type your sample questions to verify that the answers appear correctly.
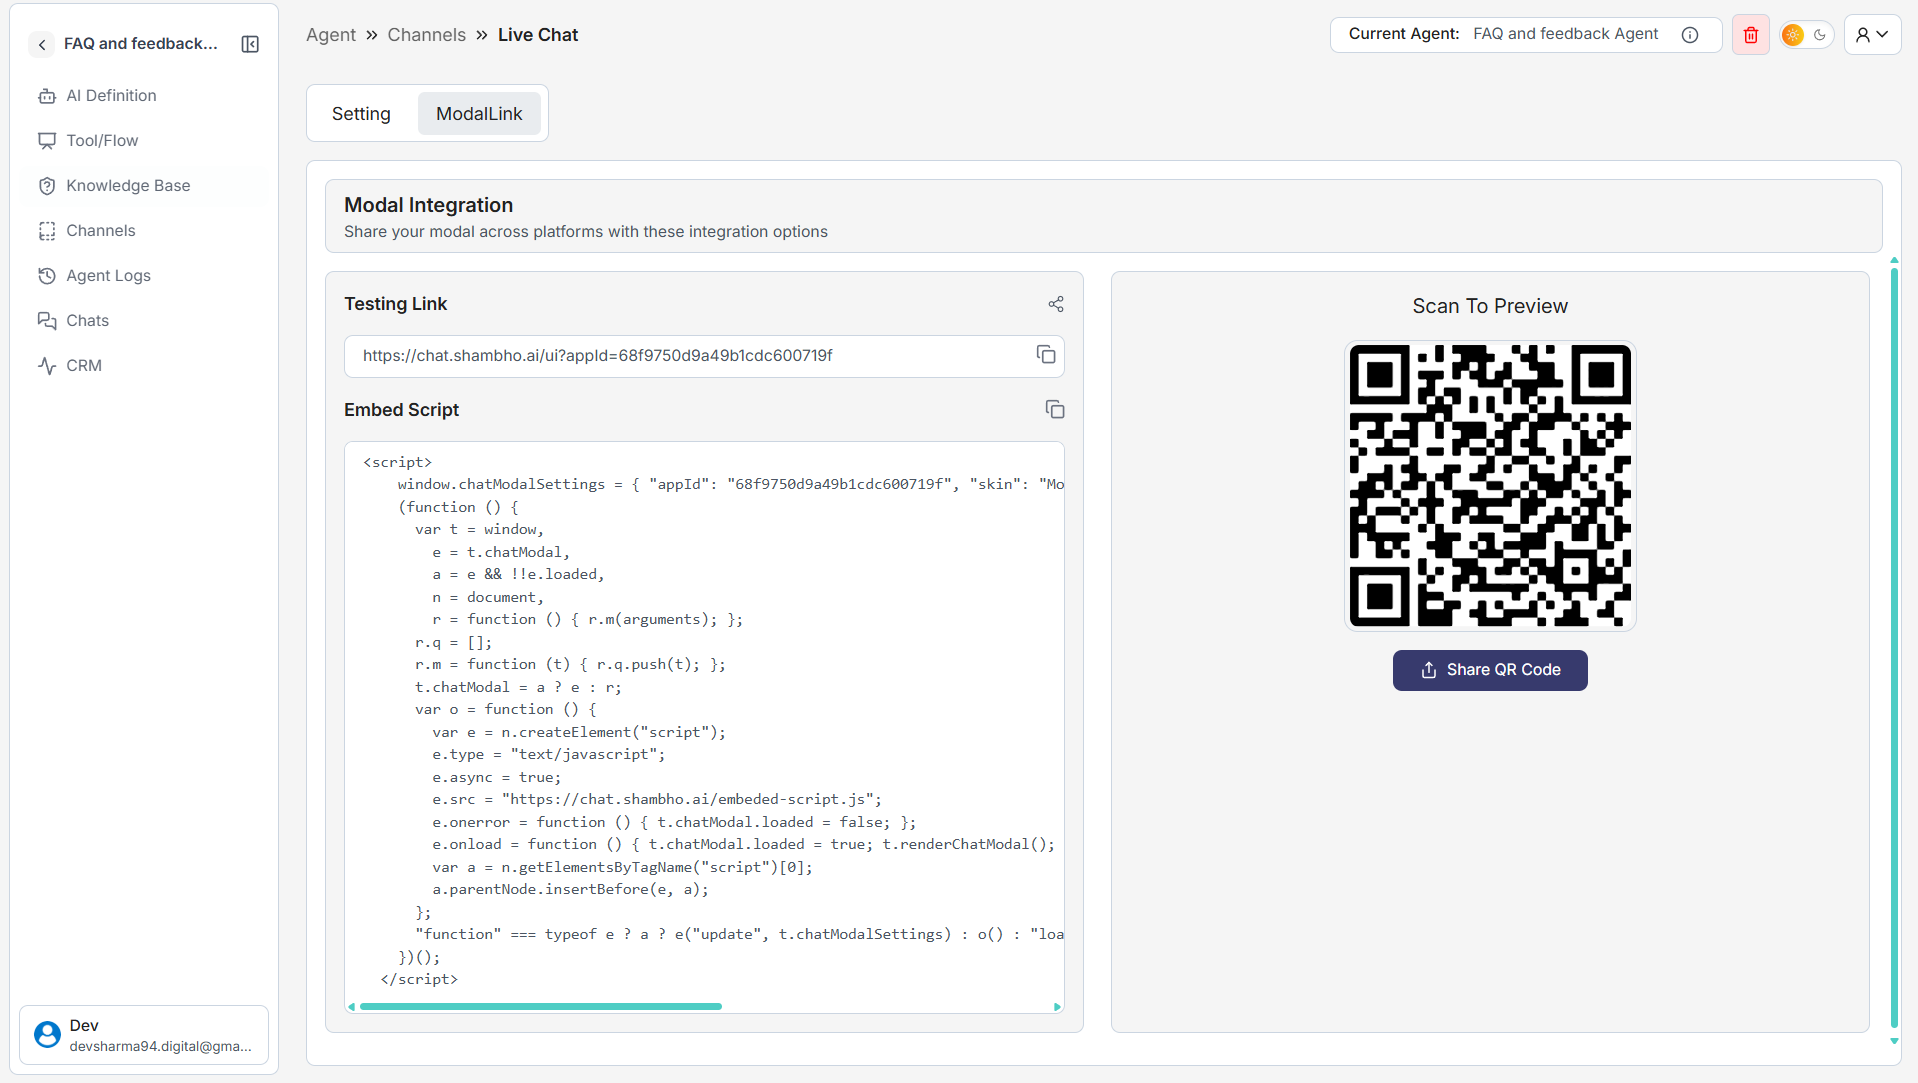
Step 10: Deploying and Sharing Your Chatbot
After testing your chatbot, you can get the code to add it to your website or share a link for a live preview.
1. At the top of the Livechat section, next to the "Settings" tab, click on Modal Link.
2. Copy the Testing Link and paste it in your browser → You’ll see how the chatbot looks live.
• Or, scan the QR Code on the right side → Instantly preview on mobile.
3. Deploy on Your Website
4. Copy the Embed Script provided.
5. Paste it into your website’s HTML code (usually inside the section). Once added, your chatbot will go live on your site.